Motion Task
Work in Groups of 2 or 4
What you will learn:
What you need:
Task Instructions
1. Set Up Nikon Camera
What you will learn:
- How to set Aperture & Shutter Speed to capture motion
- How to use a Blending Mode
- How to use Adjustment Layers (Curves)
- How to Mask an area of a photograph in Photoshop
What you need:
- DSLR
- Memory Card
- Tripod
Task Instructions
1. Set Up Nikon Camera
- Set Dial to A
- Aperture can be set between 4.5 & 6.3
- ISO will be ok at 100 unless the light is poor. If poor then raise it.
- Put Camera on Tripod
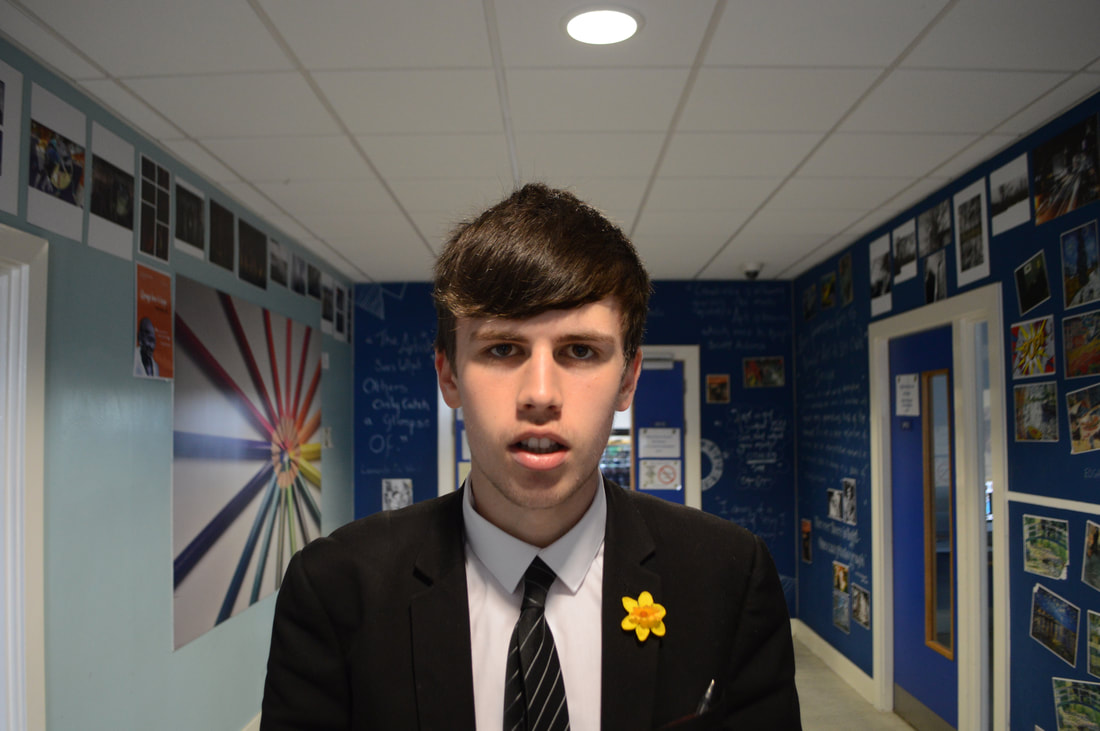
- Place subject in front of camera and take a portrait
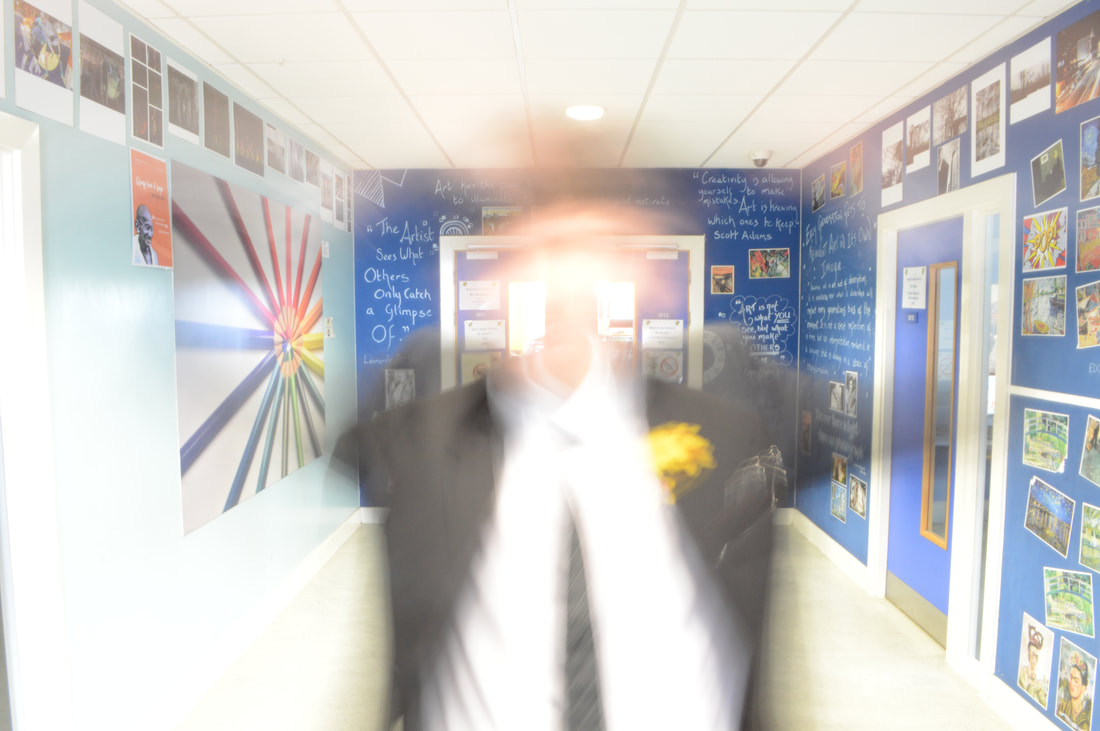
2. Motion
- Turn dial to S (Shutter Speed)
- Change the Shutter speed by pressing "i" (bottom left on back of camera)
- Use the slider (top right on back of camera) to change shutter speed to 5 seconds (5")
- Ask your subject to make a movement such as flapping arms or running on the sport. They must do this for the duration the shutter is open - 5 seconds
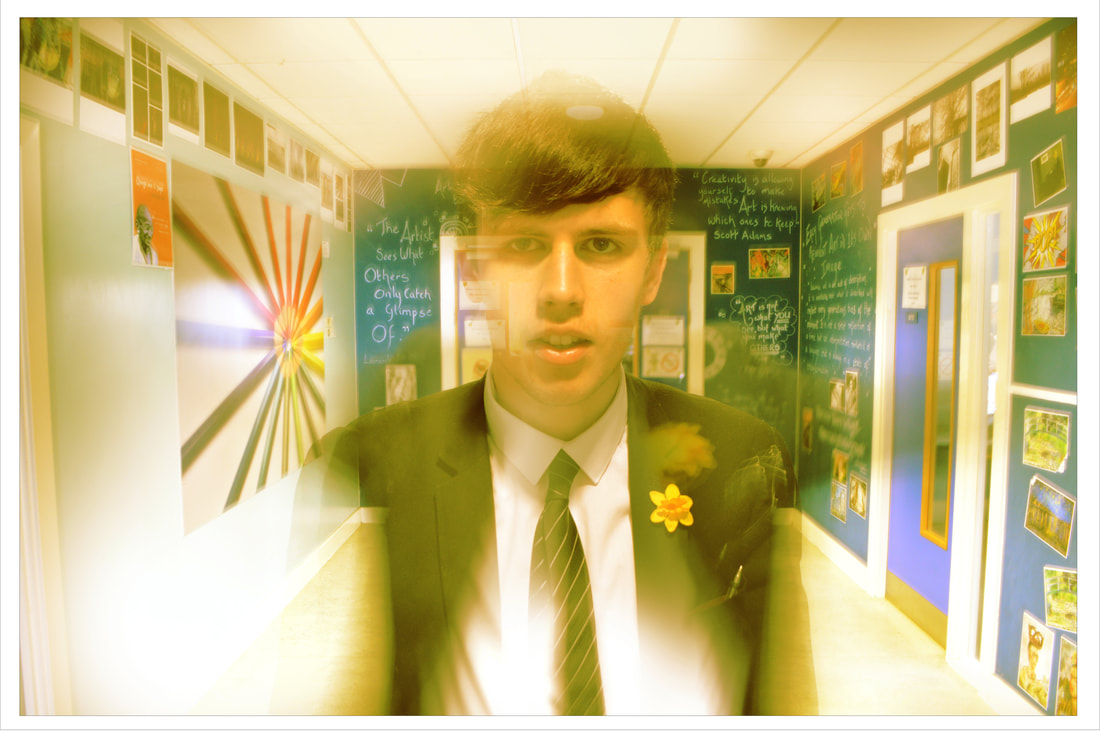
- Take the photograph. If doing this on your own you could use the timer function.
- You should end up with something like this:
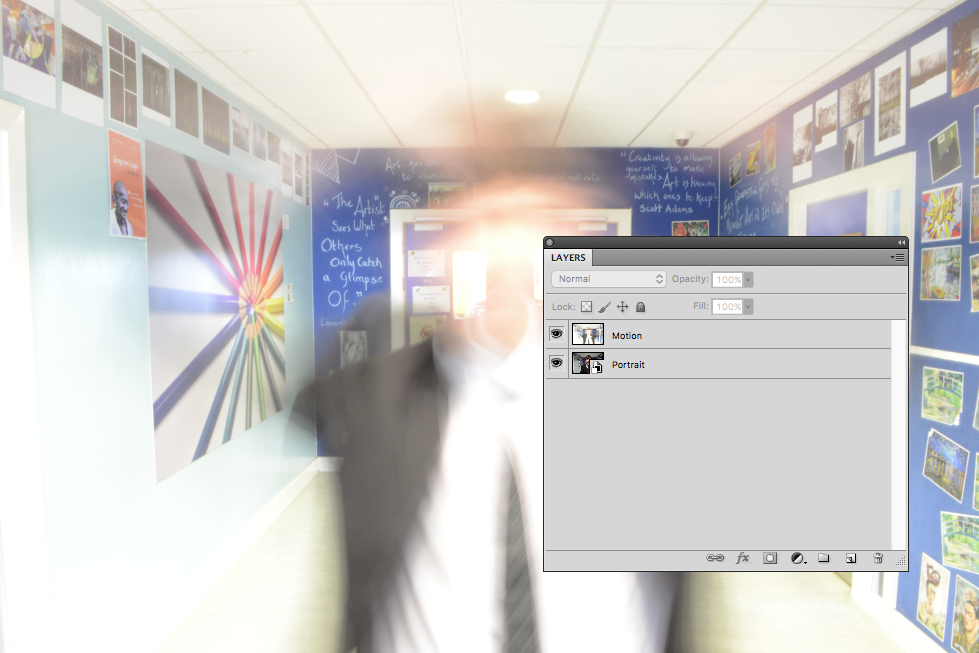
3. Edit in Photoshop
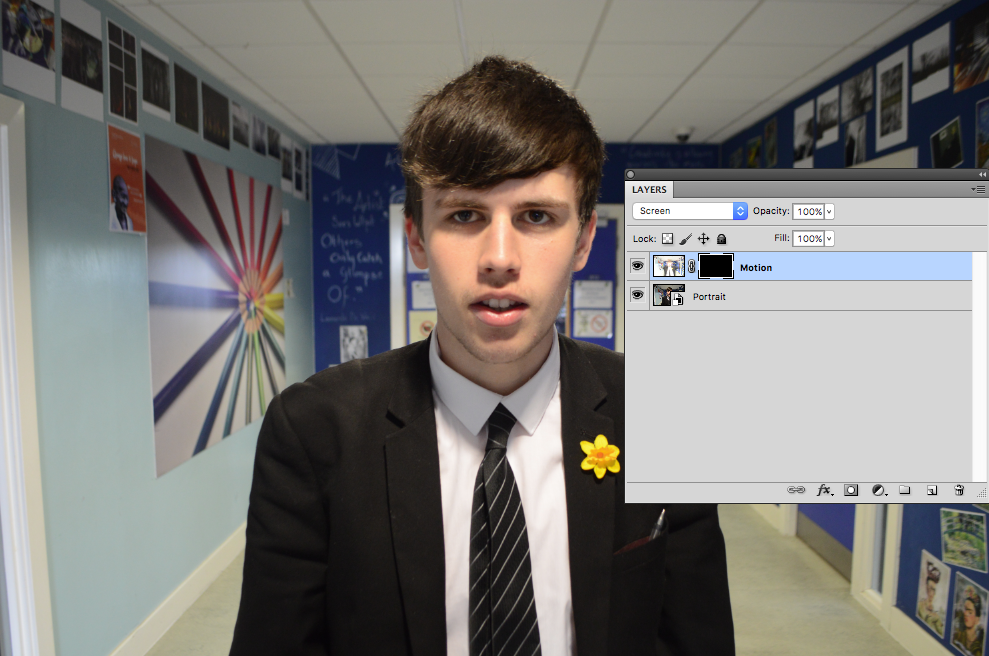
- Open both images so that they are on separate layers
- The motion layer should be above the portrait
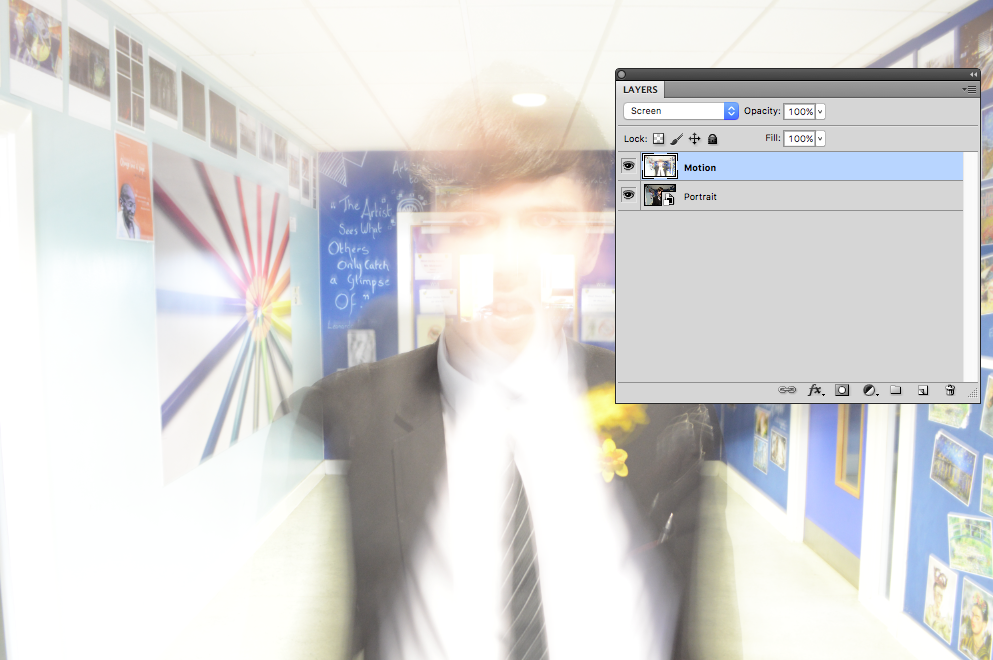
4. Add a Blending Option
- Select the Motion layer so it is Blue
- Click on Normal > Screen
- Experiment with the other blend modes
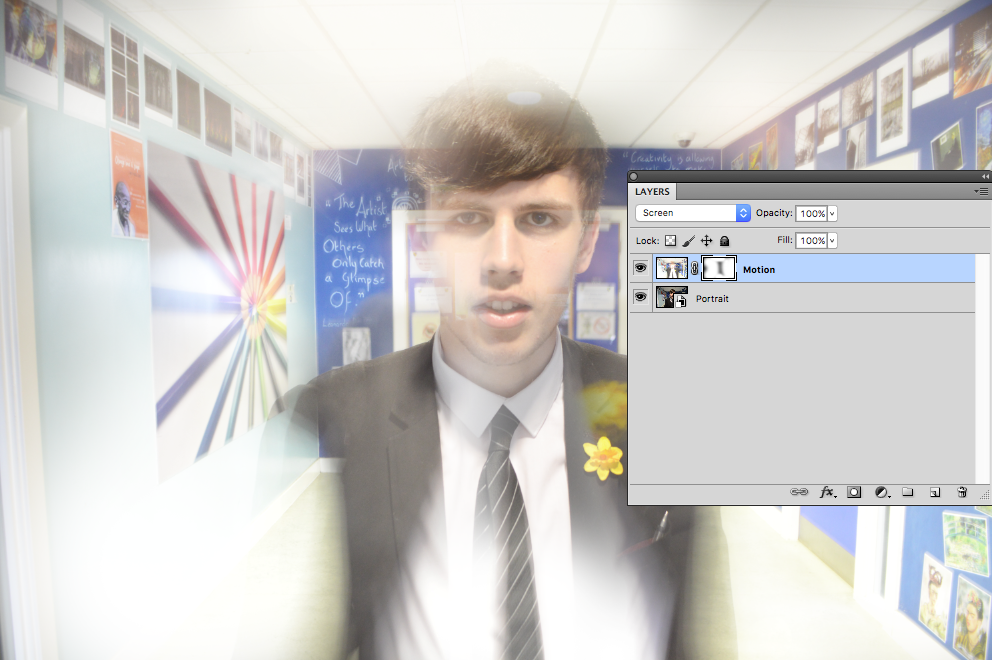
5. Add a Mask
- Press Alt & Click on the Mask Icon at the Bottom of the Layers Palette. (Square with Circle inside)
- This will hide the Motion layer completely
6. Reveal Sections of the Motion layer
- Click B for Brush
- The Brush Size should be around 2000px
- Make sure the slider is set to 0% so it is soft
- The colour should be white
- Paint in the side sections of the Motion layer until you get an effect that you like
- Change to Black to hide sections
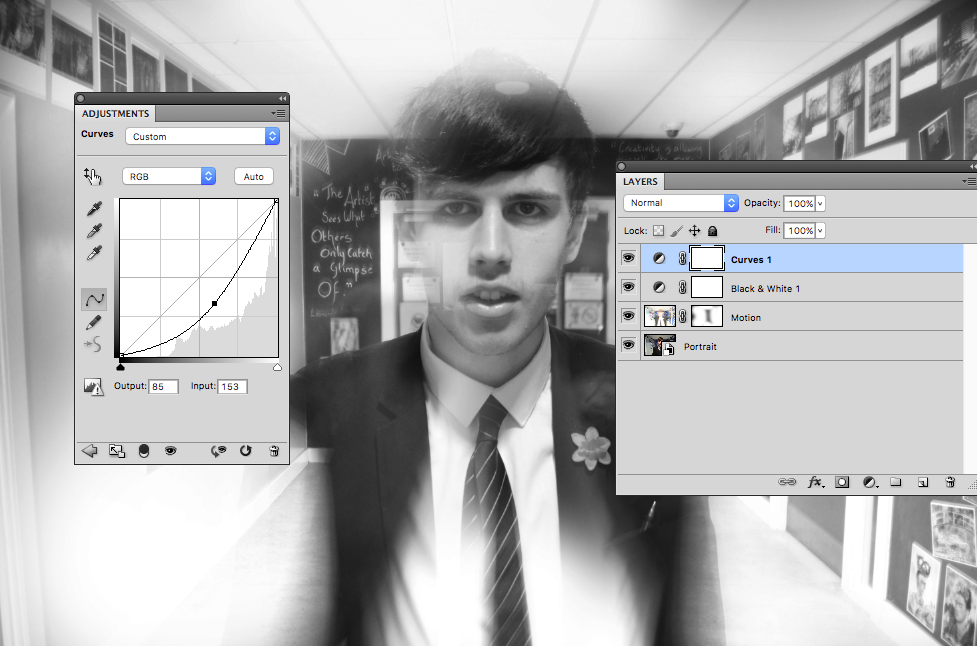
7. Desaturate
- Click on the Adjustment Layer icon (Beside Mask icon)
- Click B&W
- Click on Adjustment Layer icon & Choose Curves
- Click on the centre of the Curve line and drag to bottom right to deepen the blacks
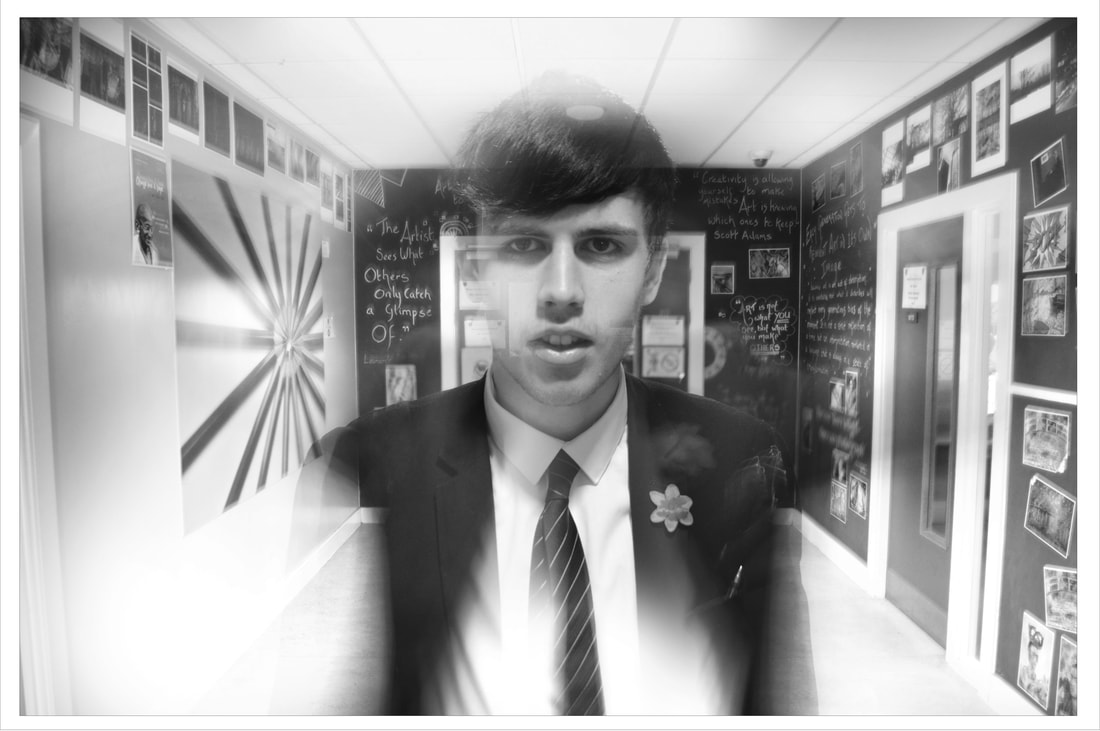
8. Present & Save
- Add a border (Create one or download one)
- Save as a MotionBW PSD file
- Save as a JPG
- Present on your site
- Explain the process. You could add screen grabs to illustrate the photoshop process. Look at your final image and reflect on your success. Explain what worked and what didn't work so well.
9. Experiment
- Now it is over to you!
- Think about what variations you can make to this process. This can be done while taking the photograph (the motion your subject makes, shaking the camera or increasing the time the shutter is open, 10 seconds?).
- Variations can also be added in photoshop. For example, Experiment with blending options whilst adding a gradient map adjustment layer or even a texture layer. Duplicate the portrait layer and then mask out the edges
- These are just suggestions. Come up with your own.
- Evidence at least 5 experiments through screen grabs and final jpg. Annotate your work to explain what you did. Reflect on the success of these. What worked well and what didn't work. What might you do differently next time?
10. Final Outcome
- From your experiments, choose a style that you really like
- Create & Present 3 different images full size in this style
- Publish your site and submit this project via SMHW.
