Simple High Key Portrait Shoot Set Up
This tutorial will help you to photograph high key portraits with a set of basic static lights. You could also substitute in any other type of light but they need to be powerful enough to light the subject and background.
Ideally, this works well with 3 lights but you may be able to get away with 2 lights but you will probably have more work to do in post production.
Ideally, this works well with 3 lights but you may be able to get away with 2 lights but you will probably have more work to do in post production.
|
"High key photography is a style of photography that uses unusually bright lighting to reduce or completely blow out dark shadows in the image. High key shots usually lack dark tones and the high key look is generally thought of as positive and upbeat."
You will need: |

|
The Set Up
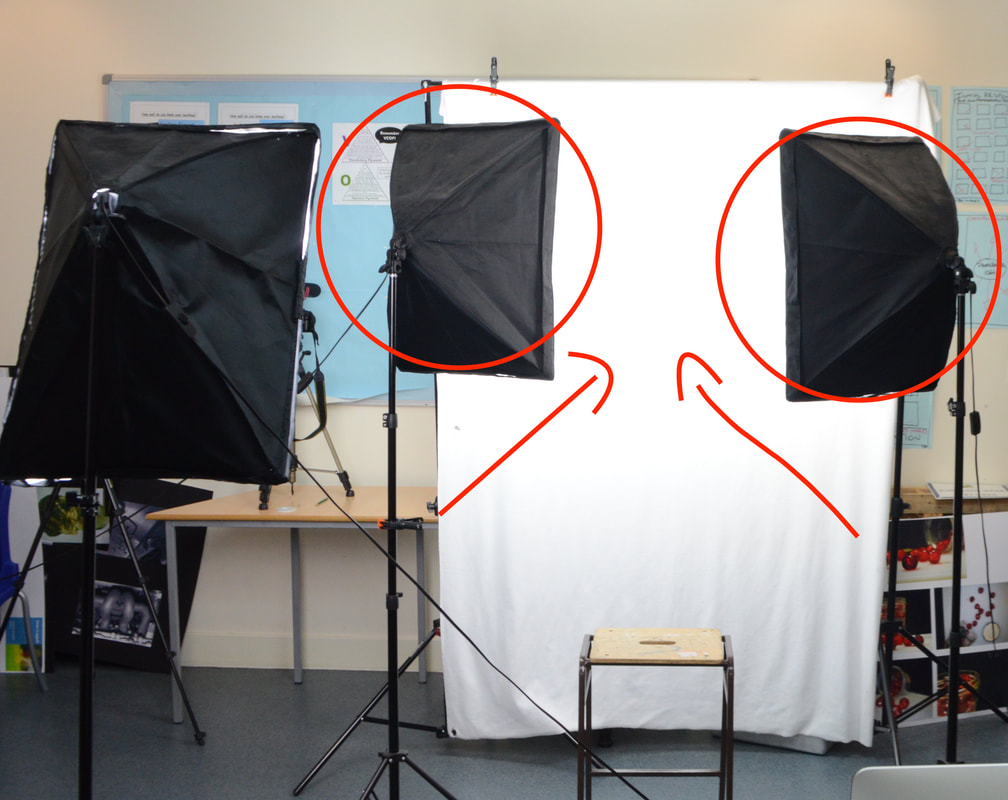
1. Set up your backdrop. Pull it tight if you can using pegs or crocodile clips. If there are no wrinkles it will save you time in the edit.
Move 2 lights into position, 1 either side. Turn them on. The idea with these is to light the backdrop. The position of lights will depend on how powerful they are so this will take some experimentation.
Angle the lights so that they point to the other side of your backdrop (see example above). Hopefully you should be able to clearly see a bright area on your backdrop. If not move them closer.
*This example will only work for head shots. If you need to take full body high key shots you will need more powerful lights.*
|
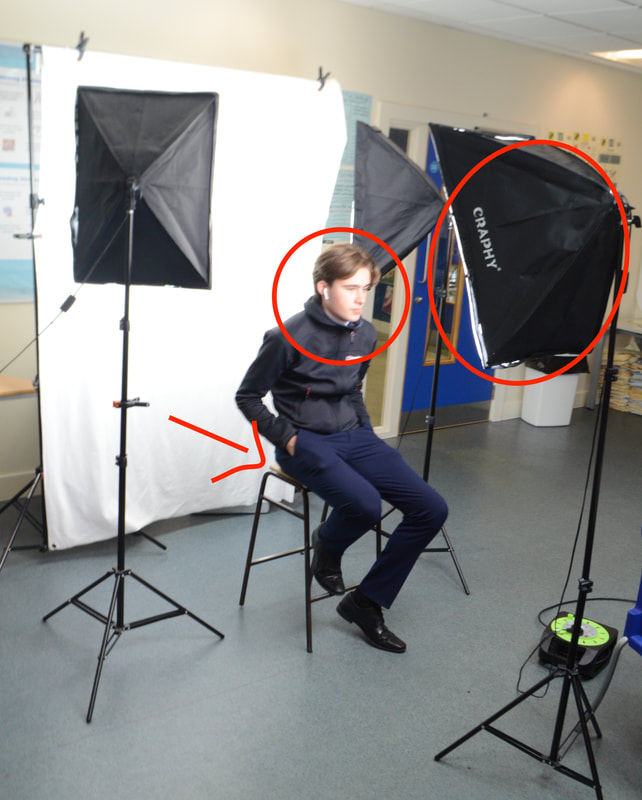
Position your subject so they are just in front of the back drop lighting. Any spill from these lights may affect the quality of your photograph. Take a photograph to check.
Position the 3rd light in front of the subject. This will be the fill light and will light your subject. The height of the light will depend on the subject. Leaving the light at a higher angle may result in some shadow. Experiment to find a result you are happy with. |
|
